So, you have photos in Facebook and you want to move your images to Google’s new social platform, Google+ (note: if you are a Chrome user, you may just want to use Move2Picasa, an addon which will streamline transfer from Facebook to Google+ for photos).
Or maybe you are tired of using Facebook and want to move your photos from Facebook to something else. Or maybe you lost all of your images and Facebook has your only copy (I hope not, but it could happen). This practical guide will take you through the painless process of getting your photos from Facebook and then uploading them to Google’s Picasa, which as a side benefit puts them directly where they need to be for Google+. Yes, painless. You will be amazed at how easy this is to do. So let’s get started, shall we?
You can also use this batch download process to get images for Flickr, too (but then you'd need to use of course, use Flickr, to get your images into Flickr!)
Getting your Images from Facebook: the Batch Process
- First you have to get your images from Facebook. You can not just batch download your images; it is all or nothing.
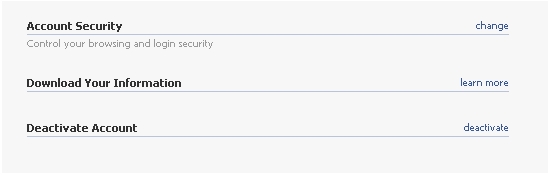
- In Facebook>Account>Account Settings>Download Your Information
- Once you are there, click on Download (once you download your information it will change to Learn More).
- Need more help? Check out my step by step process for downloading content from Facebook. Basically, it will take a while for Facebook to collect up your data. You will receive an email with a link to get your download. Facebook will email whichever email account is linked to your Facebook to let you know your data is ready.
- Your data will be downloaded into a ZIP file, a compressed folder format. If you do not have a ZIP file reader, you can download a free one called 7ZIP , http://www.7-zip.org/
- I recommend making a new folder on your computer to stick all of your Facebook data. It may be a lot of folders if you have a lot of albums.
- Once you unzip your Facebook data folder, you will see that your photos are in the "photos" folder .
- For each album you have created, there will be a subfolder in the “photos” folder.

In the html folder you will find all of your wall posts chronological as a HTML file. If you want to import those into a blog, you will need to convert it to xml (try Tidy which is free). I'm not sure why anyone would want to convert a facebook wall to a blog, but it's doable.
Importing videos from Youtube works somewhat similarly to the web-based upload at Picasa Web (Method 2).
Method 1: Use Desktop installation of Picasa (easiest)
Once you get your photos, you will go to Picasa.
Using the desktop installation (free) is easiest as it has a Batch Upload feature.
In your Picasa Desktop>Library
Tools>Batch Import
Sign into your Google/Picasa Account.

You should THEN see the batchuploader. You should see your Facebook photo albums listed under Folders, if you do not you many need to rescan or import them to a different folder.
Click on the album you want to upload and set its permission (to choose multiple albums, click the box next to the each album name that you want to upload) . You can upload more than 1 album at a time, but they will all have the same permissions (in other words, you can't choose different permissions for different folders within a single batch upload). You will receive a message indicating which permissions you have chosen.
Method 2: Picasa Web Albums (http:// picasaweb.google.com)
If you haven't dowloaded Picasa you can upload directly to your Picasa Web Albums.
Go to Upload> Create a new album (or use an existing one).
At that point you will select all of the images within the folder you want to upload (Control + A > Open) to start the upload process.
After Uploading:
Once your photos are uploaded to Picasa, you can either link to them through the Picasa Web Albums or you can Share them to your circles (network) via Google+. For each album, click on share to publish it to your circle. This will also allow tagging of photos, too.
If you've recently joined Google+ you will see this message:

Make sure to go in to your Picasa Web Albums and Google+ Photos to see what tweaks might be needed (especially in terms of privacy).
There are other ways to get data from Facebook (Backupify is one option) and batch import into Picasa ( including writing your own scripts) but this is one solution available which is rather easy to do.
No comments:
Post a Comment