I used this very nifty little tool at
widgetsplus to create a Google+ badge.
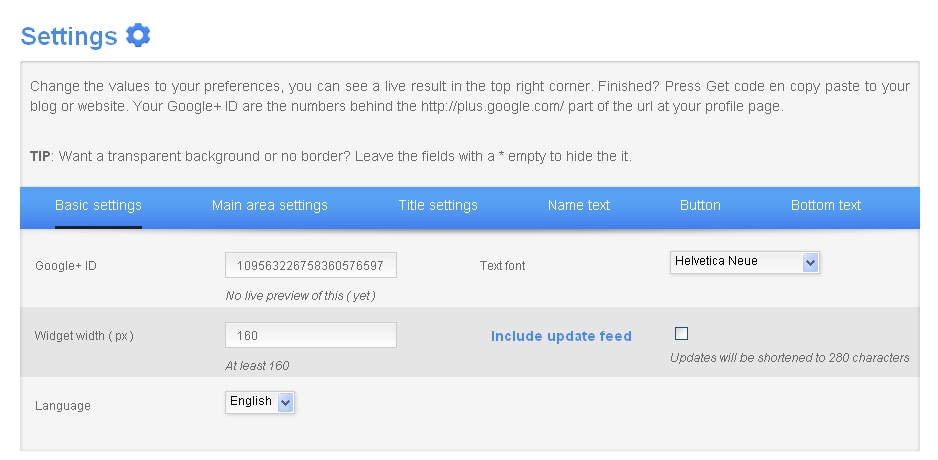
- Get your Google+ ID. (the easiest way is to login to Google+ Your ID number is the long string of numbers For example my public profile is http://plus.google.com/109563226758360576597; the ID number is that bit at the end. For more info about Google IDs, visit my post here.
- Copy your ID number.
- Customize your widget using the widget tool. If your name is very long, you will want to use a width greater than 160 or a smaller font size (it will truncate your name otherwise). My name is georgiawebgurl;I used a smaller font size since I wanted this in my sidebar.
- Basic settings: your Google+ ID, width of badge, and whether you want to include any of your latest posts.
- Main area settings: Widget colors.
- Title settings: Change the tag line (the default is Add Me On...)
- Name text: change colors, font type, and size of text relating to your name
- Button: Font size and colors for button (* makes transparent)
- Bottom text: Font size and color for text at bottom (including the latest posts, if you select 'Include update feed')
- Click on Get Code to see preview and get the code for copy + paste.
- Copy code.
Here is what the code looks like in case (yes, you can copy and paste the code, but then you still need to customize it for you!)
Add your Google+ badge to blogger
- Go to Design.
- Decide where you want to add it on your blog template (mine is left sidebar) and click on Add a Gadget.
- Under Basic Gadgets find HTML/Javascript
- Click on the + button to add it to your design.
- Title (you can leave this blank if you do not want it have any text above your widget)
- Paste in your code from widgetsplus.
- Save your template. Voila!
No comments:
Post a Comment